
this wreath is the extra
"little something"
that we needed to add some holiday spirit to our apartment. you see, we live in a pretty small place, mr p is mr scrooge when it comes to christmas decorations, and we only have a limited space to keep it all.
putting up a wreath is a great way to set the mood, because it's the first thing visitors see when they enter your home (and it's the first thing YOU see too! so it puts you in the holiday spirit too!) so, if you don't put up many decorations for the holidays, choose a wreath. actually, choose THIS wreath. because it can be stuffed in a box, squashed in there however it fits, and you can always reshape it and refluff it next year when it's time to break it out again. it's not one of those "be gentle when you put the trash bags over it! don't let the flowers come off! and set it on TOP of the stack of christmas boxes and don't let anything else touch it!" kinds of wreaths.
anyways, i made this last year, but it's SUUUPER simple enough that you don't need step by step pictures.
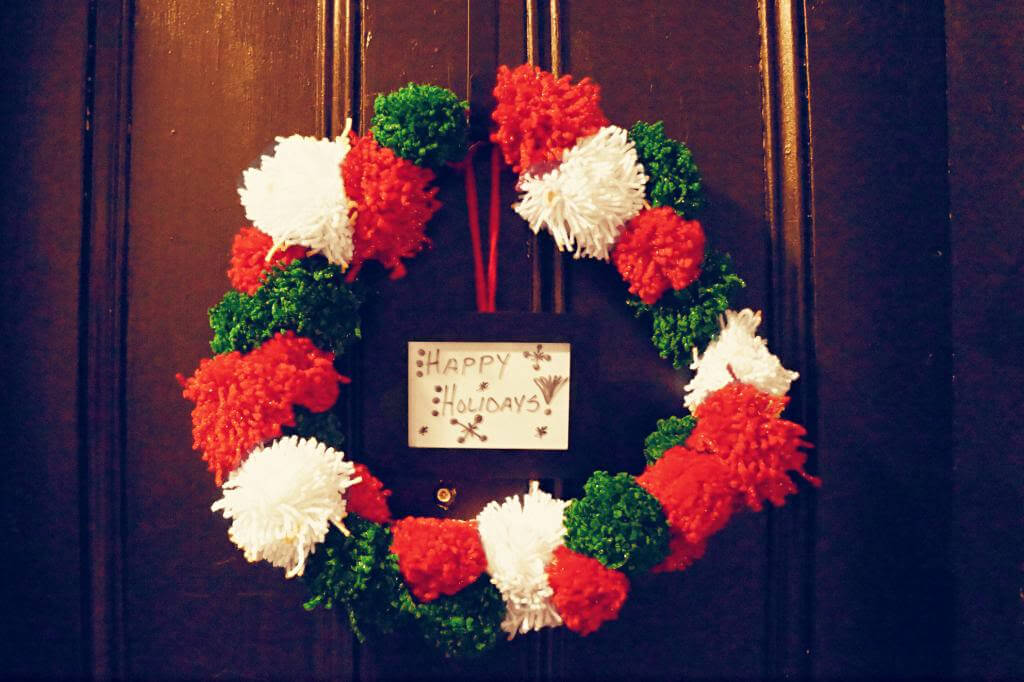
....DIY Pom Wreath....
tools/materials:
scissors
yarn
wire hanger
needle-nosed pliers
instructions:
1.
start off by making about 20-30 poms in whatever combination of colors you would like.
(excellent video of how to make a yarn pom found
here
..and while the video says to cut them clean, i like a few snaggles and some variation in pom size!
) this will take the most amount of time, so this is why i suggest doing this part first! you can make a few at a time, and come back to the project later if you want.
2.
use your hands to shape the hanger into a circle (use the pliers for stubborn corners). i untwisted the neck of the hanger so that the wreath is a simple circle, but you can leave the neck in tact for a nice hook to hang the wreath!
3.
use the long threads of the pom to tie the poms onto the wire circle, then trim as needed. the poms will be off-center from the wire, but once you bunch the poms together it will fill in more nicely.
4.
hang onto the door, and enjoy for the entire holiday season :)
5. hang a small photo frame filled with a solid piece of paper inside of it, and write a festive message on the glass with dry-erase marker for a fun addition (we first used these as food labels at
friendsgiving
! i'm sure they will have many many uses in the future. great $3 investment :P)
cheers!

3 comments:
Hi, we met yesterday!
Love your blog!
take a look at mine too :)
I'm looking forward to our collaboration!
Laura
That is the cutest thing ever! And I just made a pompom garland so this is a craft I could probably accomplish!
RebeccawithanR
Found you from the Daily Tay and am your newest follower!
LOVE the wreath, thanks for posting! I've been looking for an easy to make Christmas wreath!
Post a Comment