
here's the story. hung and i had been putting off getting a headboard for our bed for a long time. like 6 months. which doesn't seem that long for normal people, but for people who complain nearly everyday that the pillows fall behind the bed because we don't have a headboard, it's a long time.
with the way our bedroom is laid out, there's only one location that the bed fits while allowing the drawers beneath the bed to fully open on each side. this spot puts the head of the bed about partly in front of the exposed brick area of one wall, which leaves about 7 inches of space JUST big enough for all of the pillows to fall behind the bed.
we knew that putting a standard headboard on the bed would waste that precious 7 inches of space behind half of the bed, so we knew we needed to put shelves behind the headboard..... shelves that would hold our phones, glasses, chapstick, etc. since we don't have room for a nightstand and desperately needed a "landing zone" for that stuff. how hard could it be right?
if we bracketed the shelf "planks" to both the wall and the headboard, the shelves could also support the headboard without needing to secure the headboard to the bed.
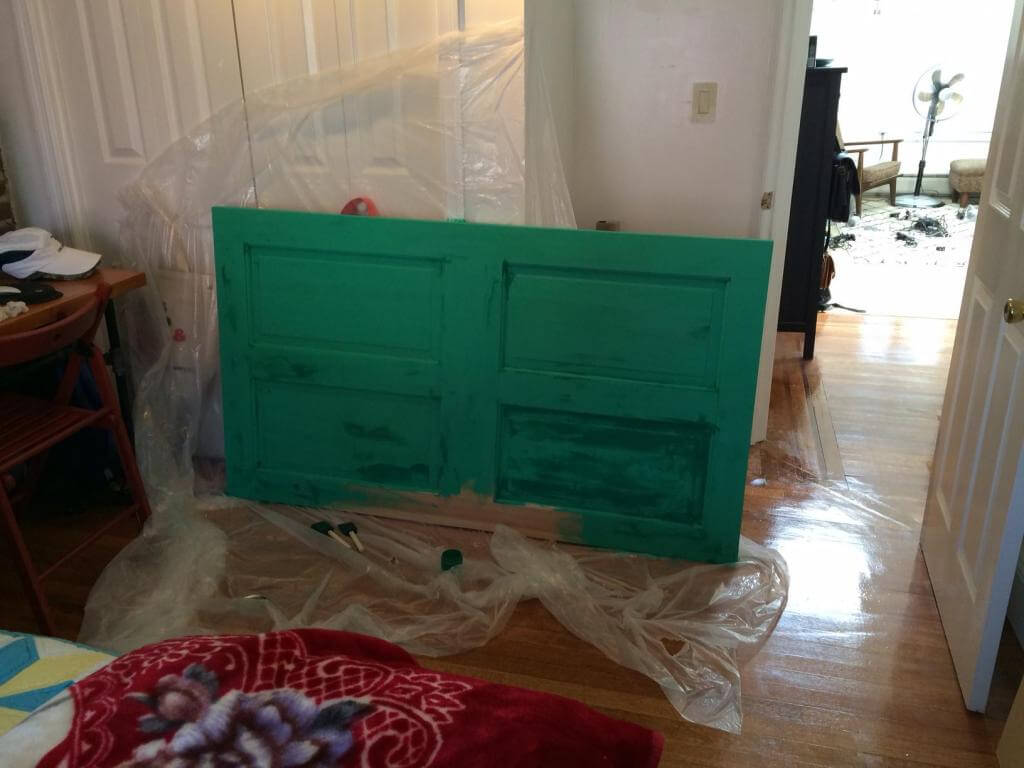
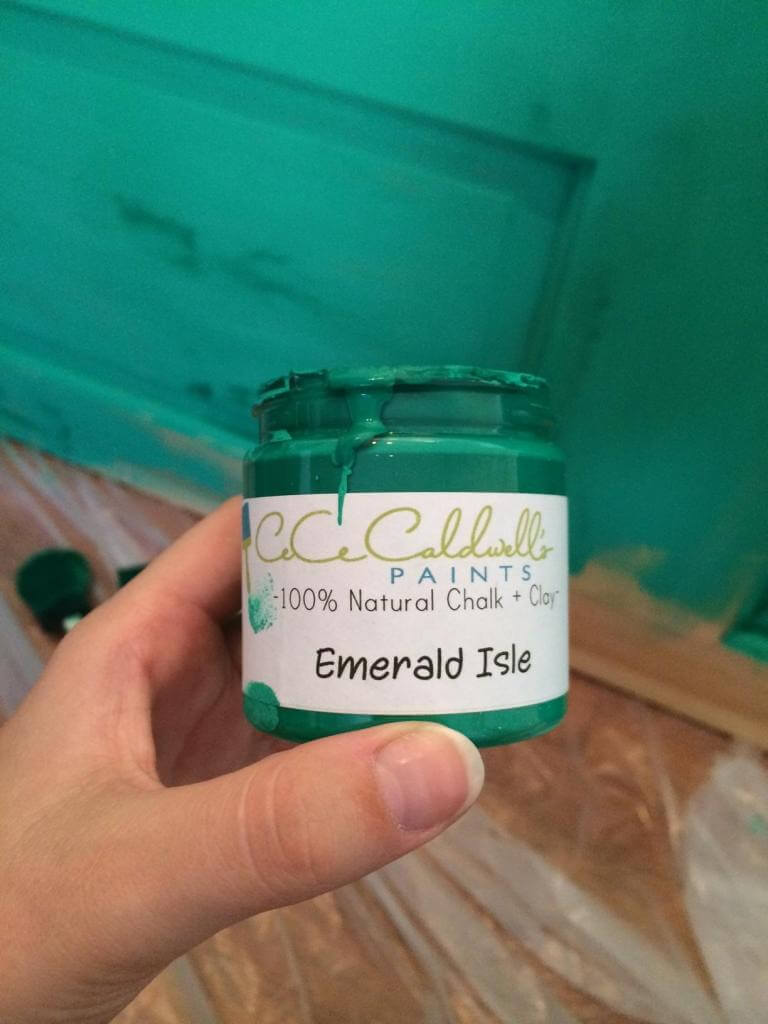
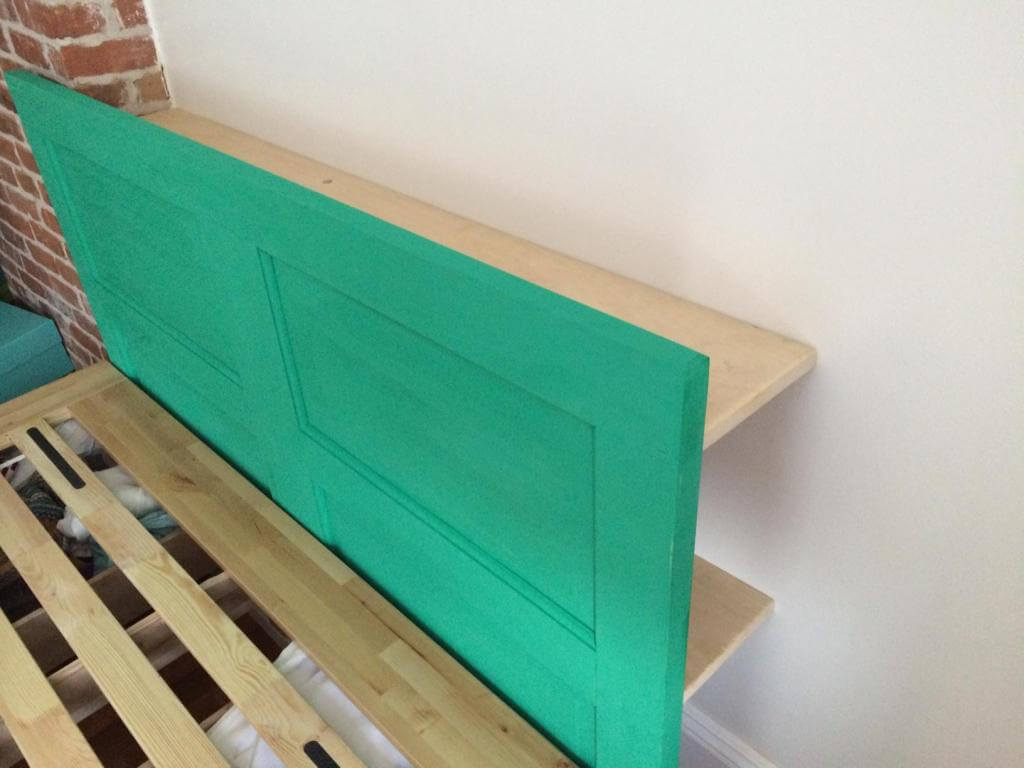
i wasn't quite sure what to use as a headboard though. do we find a vintage headboard? do we repurpose something into a headboard? do we buy a new headboard? do we make a tufted headboard ourselves? in the end, i decided that a reclaimed door would be perfect. we had this tiny container of green chalk paint that i could use to "white wash" the color on, even if the door was REALLY rustic and not super smooth. searching for a reclaimed door in THIS area though is nearly impossible. they are either well over our budget, or "snagged up earlier that day". seems that everyone is jumping on this whole "reclaimed wood" stuff.
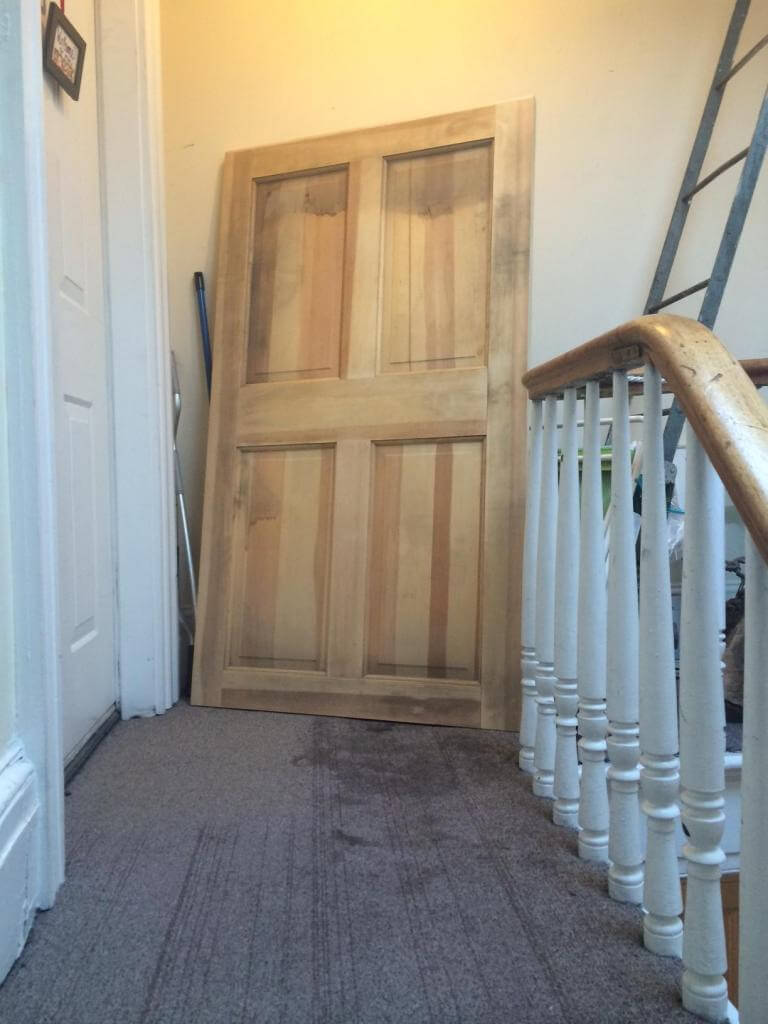
i thought i was taking a long shot when i emailed henderson lumber mills if they had old doors. i knew they recreated doors for the brownstones in our neighborhood, but i figured people either wanted their old doors back, or the doors would get tossed. i was right, they didn't have any old doors, BUT... (this is the good part) they told me they had "new-but-unsellable" doors that they could give me. they warned me that they were water-stained, split, or both, and their email sort of sounded like they knew what they were offering wasn't what i wanted. after asking the price though, i was SOLD. they gave us an unfinished, solid wood, paneled door (yes, with water stains, but we didn't care, we wanted to paint it anyways) for only $10! they cut it to length and grinded the edges for us and everything. hung did the leg work of going to the shop, picking out the door, and picking it up after work. he was sad to tell me it was going to be more expensive than what they quoted.... it was $10.35 instead of $10 (extra $0.35 for tax, that punk had me worried for a second!)
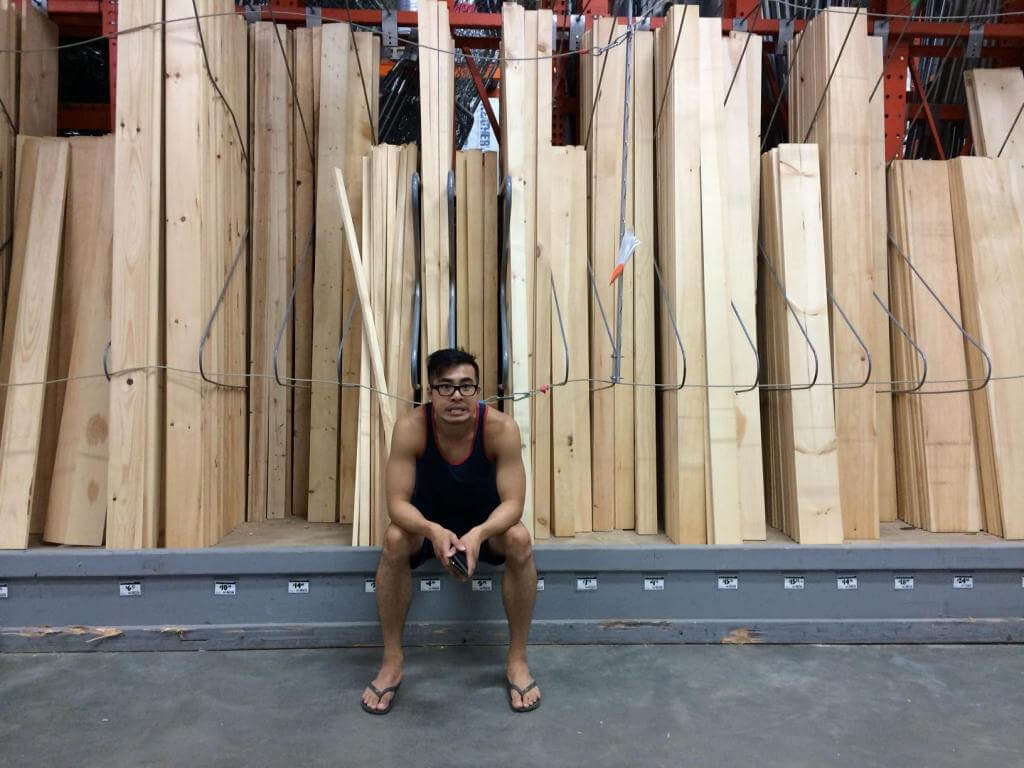
saturday was the big day for painting and DIYing the headboard after getting all of our materials from home depot. we needed to fill up at least 7 inches of space, so we picked up 1x8's because the finish size of 1x8 lumber is 7.5 inches wide, perfect! 2 shelves, small "L" brackets to attach to the wall and the headboard, and wall anchors for the wall side, and we were set! the hardest part was figuring out how to install the last brackets connecting the shelves to the door after the shelves were hanging on the wall. i wish i would have taken a photo of hung squeezing himself back in there with his long arms turning the last screws with the tiny little small-space screwdriver.

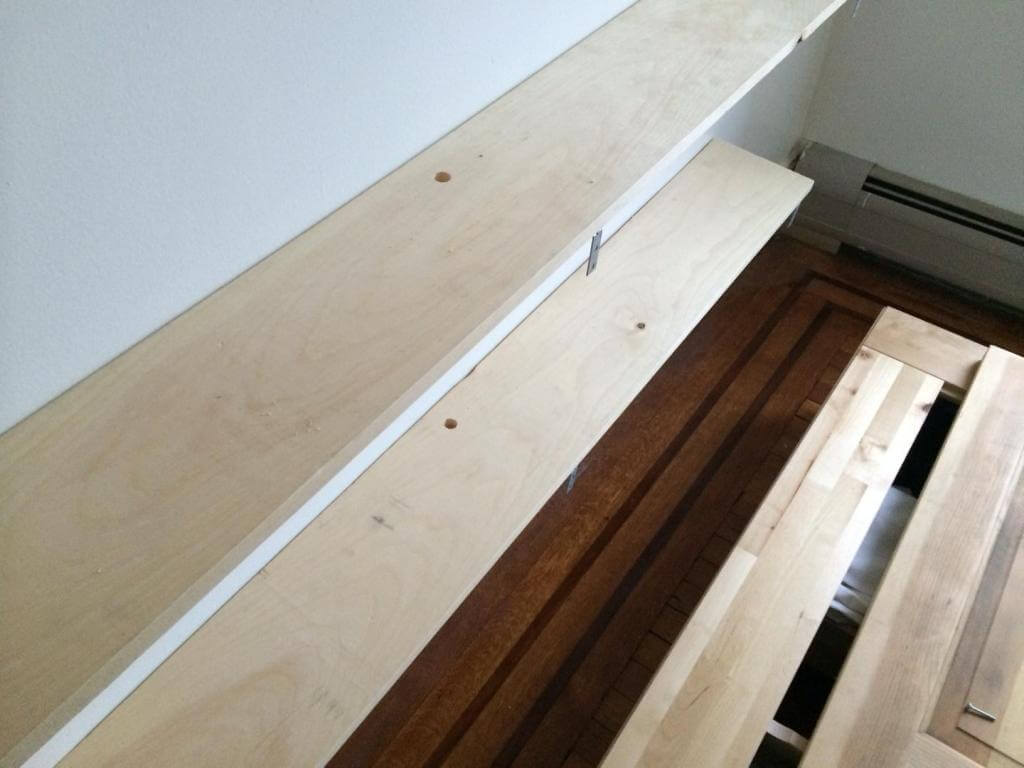
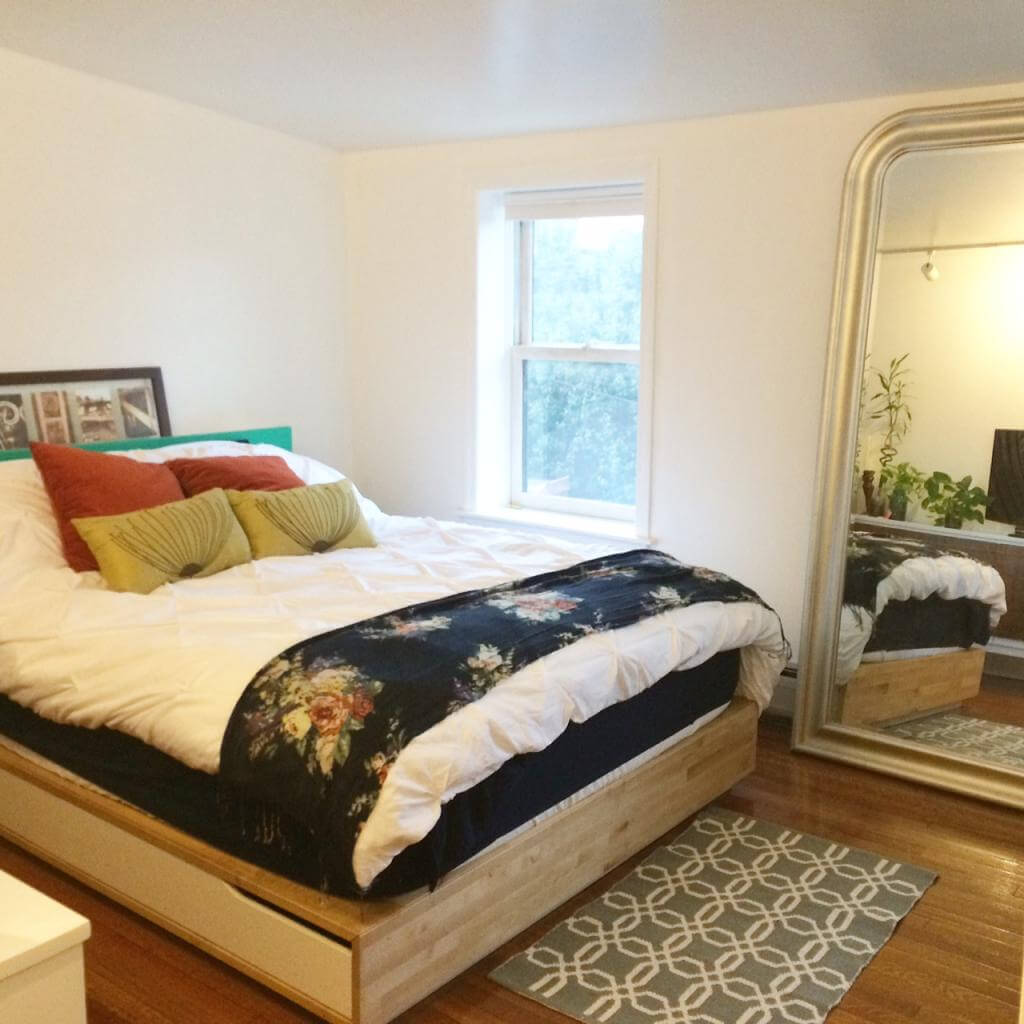
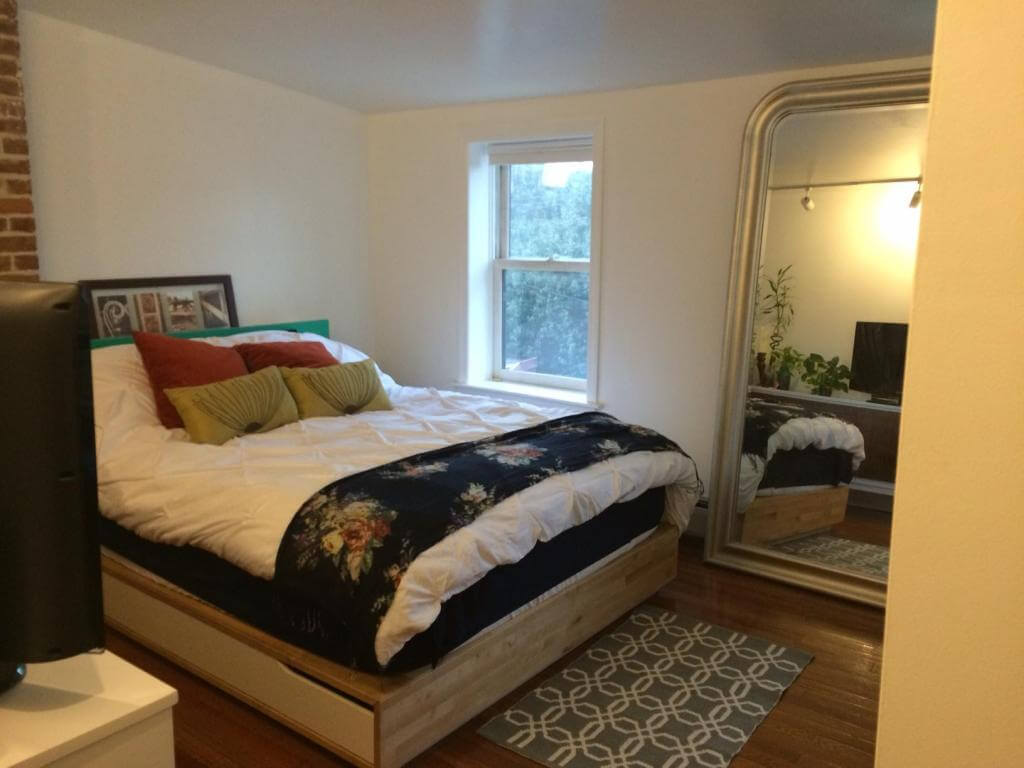
can you see the holes we drilled for our phone charger cords?? there's an outlet behind the bed, perfect for phone-charging over night, but without drilling the holes, the outlet is useless!!
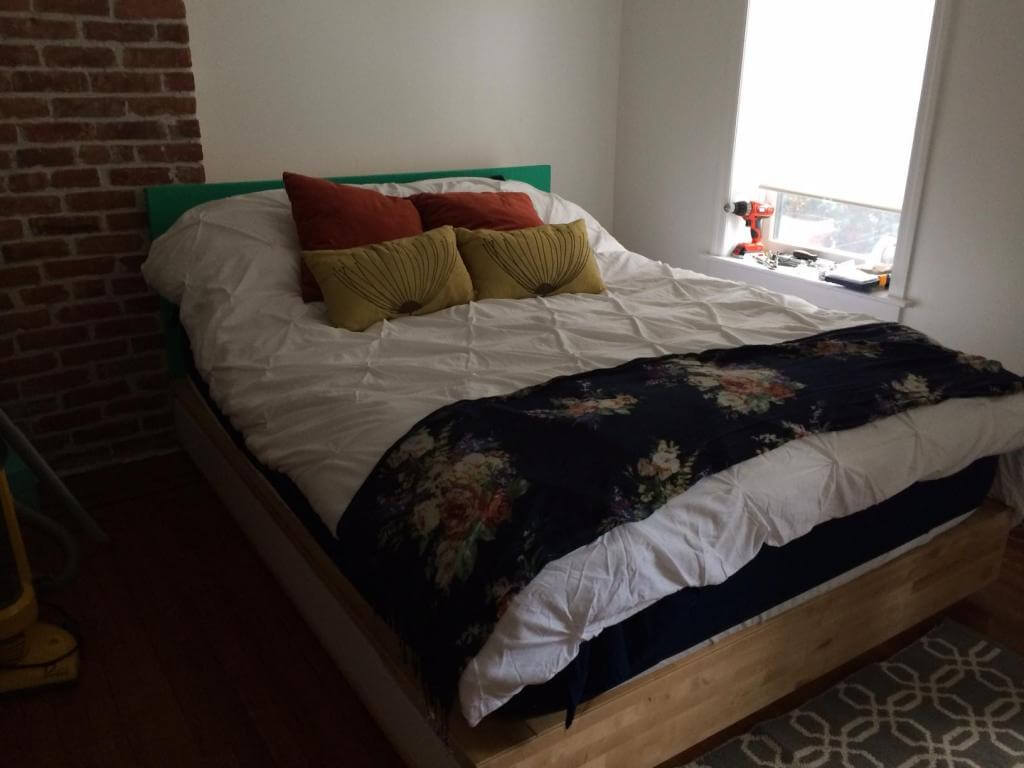
anyways, here's the finished product!!
want to know the price breakdown? here you go...
(2) 4-packs of 2 inch galvanized corner brackets = $4.68 x 2 = $9.36
(1) 1x8 x 10' lumber, cut into 2 54" lengths = $14.12
(2) 6-packs of #4-10 sharkie wall anchors = $1.98 x 2 = $3.96
(1) water-stained paneled door from henderson lumber mills = $10.00
(1) 8 oz. container of CeCe Caldwell chalk paint in emerald isle = $8.00
total excl. tax = $45.44
total incl. tax = 7% = 1.07 x $45.44 = $48.62
a custom headboard for less than $50? works for me!!
and here's a very general breakdown of the work involved:
- paint the door (FAST! the chalk paint dries SO fast... minimum top, sides, and front faces)
- drill brackets to both long sides of one of the large faces of the wood planks (brackets are for attaching the shelf to both the wall and to the headboard. we installed the door-side brackets on the flat face of the door, i.e. not where the panels are. keep this in mind when choosing a location for the brackets on the planks!)
- hold shelf up to the wall where you want it to be and make sure it's level with a level. mark with a pencil where the holes of the shelf will be on the wall (keep in mind that you want the top shelf 4-6 inches below the top of the door for it to be hidden).
- predrill pilot holes into the wall with the drill size indicated on the anchor package.
- push the plastic anchors into the pilot holes in the wall, making sure that the "wings" of the anchors will not overlap when you install the screws.
- hold shelf back up to the holes, and drill screws into the anchors, through the brackets.
- drill holes where you want your electronics cords to come through (make sure to measure the width of your electronics cords! we needed a 5/8" drill bit to allow USB cords through)
- repeat steps 3 through 7 for the second, lower shelf.
- hold door up to the shelf and mark with a pencil the location of the bracket holes on the door.
- set door back down and drill pilot holes into the door with a bit smaller than the screw.
- hold door back up to the shelves, and install screws into the door with a small-space screwdriver (our drill wouldn't fit inside the 7.5" gap between the door and the wall).
what's next in store for this room? did you see the recent article on apartmenttherapy.com about printing "architectural" prints at an office supply or blueprint shop? our we-need-to-save-for-a-wedding-reception budget tells us we need to only do budget-friendly projects for a while. the plan is to pick up cheap poster frames from the craft store one at a time with their weekly "40% off one item" coupons and print the photos from a blueprint shop. i'm guessing (hoping) it's going to cost us $25 or less. challenge accepted!
one last thing. did you see the new magazine app from HGTV's designer genevieve gorder called The Real Genevieve? it's got a GREAT article on jersey city in the inaugural issue. go download the app now. afterall, it's free!
cheers.
jenn
No comments:
Post a Comment