Showing posts with label DIY. Show all posts

Wednesday, January 7, 2015

wine cork garland

pinterest gets the best of you sometimes, "making" you save all these tiny scraps of stuff so you can (forget to) finish a project in the distant future.  i think my husband might burst if i save the scraps of any more crafty projects (though i can never have enough yarn, i do everything BUT knit with it lately!)

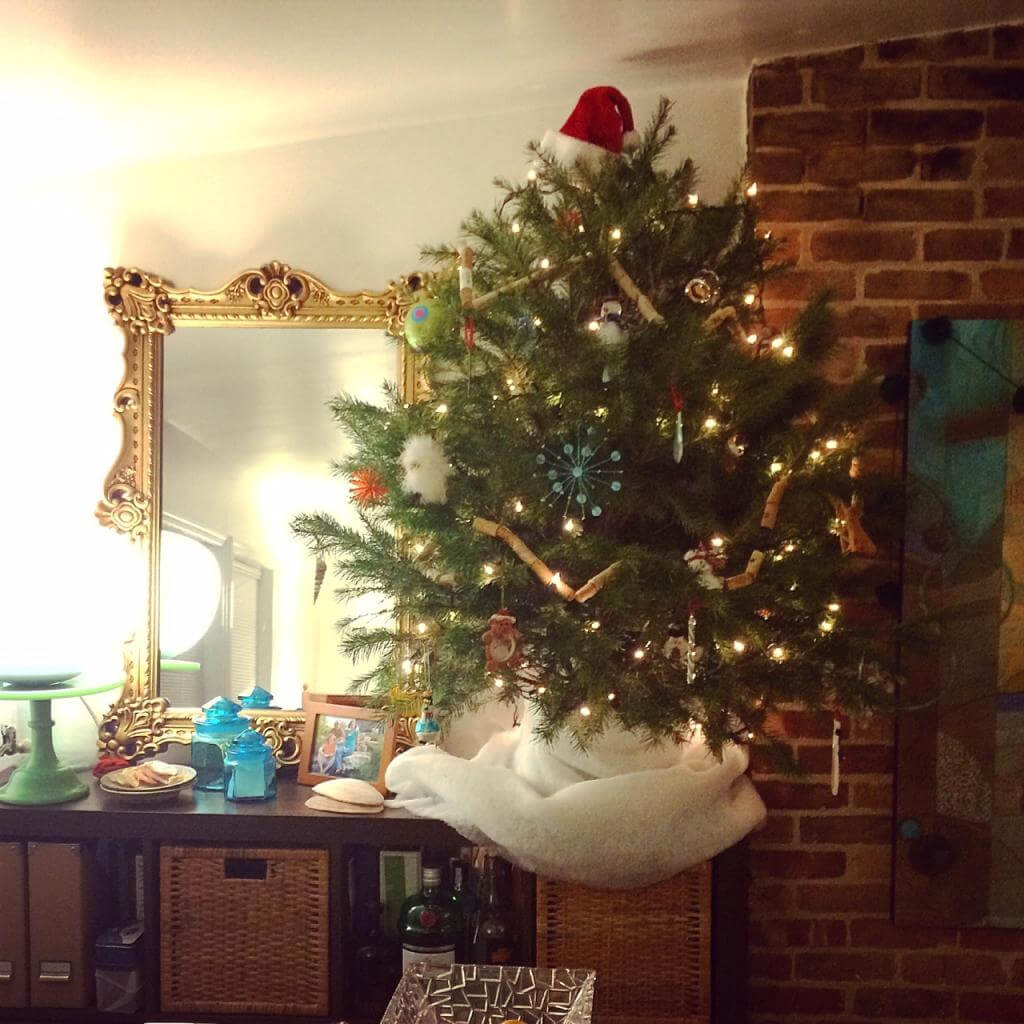
one that finally came to fruition this past holiday season was wine cork garland! sure you can go to a thrift store or ebay or amazon and buy wine corks and make it now, but what's the fun in that? don't you want to DRINK the wine the corks came from?  i had been saving them for about 3 years, and i finally had enough to string them and hang them on the tree!

DIY wine cork christmas tree garland

it's as simple as drilling a hole through the long end of the cork and slipping a long piece of fishing line through it (i bought the 50 lb fishing line, but now that i have it maybe that was overkill.  the good thing is that the fishing line is stiff so it usually went through the hole in the cork without a needle).  i started off holding the corks with pliers to keep my fingers away from the drill bit, but ended up just using my fingers to go faster (oops!).  i also started off with the tiniest drill bit, but soon realized that a larger hole didn't hinder the cork, and the fishing line was WAY easier to slip through without a needle if i used a bigger drill bit.

DIY wine cork christmas tree garland DIY wine cork christmas tree garland

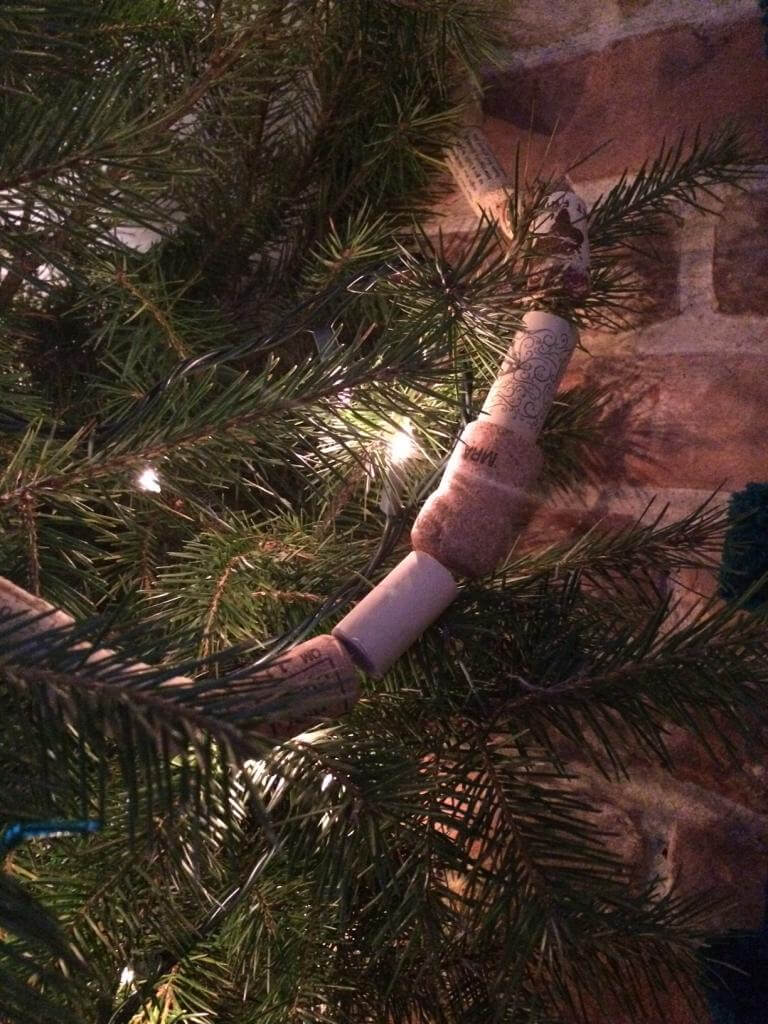
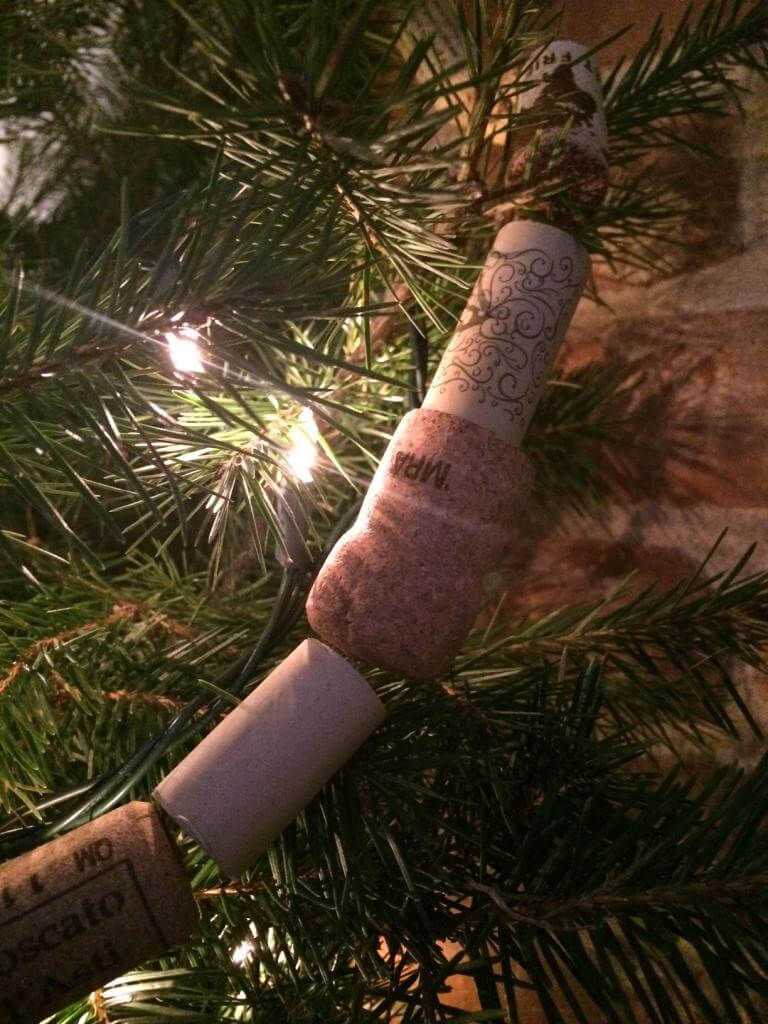
i drilled a few corks, threaded them on the line, drilled a few more, threaded them on the line....  i didn't want to get too far ahead of myself because sometimes i would need to redrill the hole if the fishing line got stuck.  i just tied the end of the string in a knot around the wine cork on each end to finish the string of garland.

the finished project turned out so awesome! well... for about an hour and a half worth of my time anyways.  maybe next year i will take it apart and put some poms between some of the corks or something fun like that ;)

nearly free and lots of character. those are the kinds of projects i like to do!  it's such a simple project that i didn't think it needed a lot of explaining, but if you have further questions, just ask!

pin this now, so you remember it next year when you have enough corks to string on your tree ;)

cheers.
jenn

Monday, September 8, 2014

DIY paneled door headboard for under $50

after a night spent flying home from a business trip, partying with e.tittlemouse and co. at the night of noir event for jc fridays , and snagging a "night cap" of sour cream blueberry ice cream and earl grey fudge ice cream at milk sugar love , who knew we could even be functional on saturday, let alone saturday MORNING.  (see tomorrow's post for details from the night of noir event!!)

 photo diy_door_headboard_2014090810.jpg

here's the story.  hung and i had been putting off getting a headboard for our bed for a long time.  like 6 months.  which doesn't seem that long for normal people, but for people who complain nearly everyday that the pillows fall behind the bed because we don't have a headboard, it's a long time.

with the way our bedroom is laid out, there's only one location that the bed fits while allowing the drawers beneath the bed to fully open on each side.  this spot puts the head of the bed about partly in front of the exposed brick area of one wall, which leaves about 7 inches of space JUST big enough for all of the pillows to fall behind the bed.

we knew that putting a standard headboard on the bed would waste that precious 7 inches of space behind half of the bed, so we knew we needed to put shelves behind the headboard..... shelves that would hold our phones, glasses, chapstick, etc. since we don't have room for a nightstand and desperately needed a "landing zone" for that stuff.  how hard could it be right?

Wednesday, April 24, 2013

manly things: DIY pipe base for a desk

so... we had a bit of an unfortunate incident last weekend...
 
(but i like to think of it now as a blessing in disguise :P)
 
you know that awesome desktop we made for our iMac?
 
(ok, i admit, there was no "we" in making the desk for "mr p's" iMac) 
 
anyways, so we had already remounted the thing once, and we usually kept our elbows from resting on it for fear that it would fall off of the wall...  but give us a bottle of wine and some serious googling action, and DOWN SHE WENT!!   i suppose drywall screws aren't meant for cantilevered desks are they? we used them because there's brick behind the drywall and we don't have proper tools to mount something in it (we don't THINK anyways)
 
so mr p unexpectedly spent much of his sunday afternoon figuring out a new desk situation.  remounting obviously was the wrong choice, but with a baseboard heater at all 3 adjacent walls and sloping, uneven floors, what's a guy to do!? buying an entirely new desk was out of the question.
 
i'm going to give full credit for the solution for the final product to mary bicycles :
 
 
no, we didn't have the awesome scavenger find of a butcher block countertop, but we DID have a DIY'ed desktop that mr p and his friend zack made last summer (sentimental value and all)
 
 photo photo_zpsecdf77b7.jpg  
(sorry for the terrible phone-quality pic.. i'm in boston and it's all i had, and i REALLY wanted to share it with you all!)
 
mr p simply followed the instructions using modified measurements for our table (modified for width, height, and making sure the back legs were forward of the baseboard heater in the back), and took off for home depot.... a few cuts at the store, a little screwing together at home, and a few screws into the desktop and voila! a new AWESOME-looking, loft-ish-inspired desk!  mr p even told me he sat on it to make sure it was sturdy.  pretty sure we can rest our elbows on it when we get a bottle (or 2 or 3) of wine in us and get some omg-you-have-GOT-to-see-this mentality going on :)
 
doesn't it look fantastic!? 
between mr p stepping up to DIY this awesome desk, cleaning the ENTIRE house, picking my mom up from the airport, cooking her dinner while i was still away in boston, and tolerating our quirkiness together this weekend... makes me want to just squeeze him to pieces and shout to the world that i'm the luckiest girl in the world :)

(cheeseballfest is over)
(but really though, he's a pretty cool dude)
 
cheers.
 
 
p.p.s. more DIY's and renovations
p.p.p.s. did you know we're on instagram (@beyondthestoop)  and bloglovin?

Tuesday, April 16, 2013

bathroom update

it's been a WHILE since I've posted an update on our apartment.  though we aren't really "renovating" anymore, we still make changes here and there, and before you know it, it's a totally different space!

the bathroom is one such room.

last weekend i had HAD IT with the ugly over-the-toilet ugly metal rack that wasn't over-the-toilet (leftover from the old apartment).  it housed basically all of my bathroom essentials, so i couldn't get rid of it until i had a solution in hand.  mr p and i took butts to home depot and got ourselves some DIY'ed shelves just like the ones in the kitchen and the living room

(WHY didn't we think of this before if we did the same thing in every other room!?)

mr p did it all by himself too! he's a pro at these shelves by now.  check out a quick adventure through the progress:

 photo bathroombefore_zps6201ef9c.jpg
 
 photo IMG_7990_zps75f49609.jpg
 
 photo IMG_8042_zpse6ebcbba.jpg  photo IMG_8052_zps3e27b0bc.jpg
 
 photo ba452fa0-6946-4718-9b23-7f6115fc3e3e_zps7379d04c.jpg  photo 4032f9bb-39be-4356-8d0a-ad867bcb5d41_zpsa217bfc1.jpg
 photo 327792fa-4ee6-4d6d-a18f-bfdac42f2d09_zps8c654b21.jpg
yikes! we went for SO long like this. no full-length mirror, ugly metal over-the-toilet thing that's not over-the-toilet, overflowing laundry (thanks to kickboxing ), overflowing bins of bathroom stuff i don't use, stained towels
(guess the dye doesn't stay in your hair too well if you dye it 3 times in one day... oops?)
 
 photo 2b83725f-a93b-4cb8-99e7-0d43246f97e0_zps1ac933be.jpg  photo 0c958f3e-fce1-43ce-ac2f-ff7794260688_zps2cb0b754.jpg
 ahhhhhh.... so much better.
(p.s. chevron fabric stretched over a wood frame, DIY instructions here)
(p.p.s. with the new mirror we didn't have room for 2 fabric frames, so i "recycled" old photo frame and cut the fabric to fit!  great second use if you ask me)
(p.p.p.s. i spray-painted the yellow chair here)
 
now if i could just part with my laundry basket i've been toting around since high school (through all 14 moves and everything)
 
i just want to find one that looks nice, isn't $100, and isn't something you see in every big box store.
(i may settle for something like that, but i'm going to try my hardest to find something spunky and unique!)
 
does anyone have any good resources for fun hampers?
 
(wait did i just say that? i MUST be getting older if i'm excited to look for laundry hampers)
 
cheers!
 

Monday, December 17, 2012

elf on the shelf at santacon nyc

 
i can say that out of the thousands of santacon participants last saturday, i was the ONLY elf on the shelf that i saw!! there were plenty of girls with next to nothing, plenty of drunkeness, plenty of almost-accidents between pedestrians and cars, plenty of over-crowded bars with lines out the door...
 
i DIYed my costume last year but couldn't participate in santacon because we were dealing with our water to the building being shut off !  the costume was simple though: i cut the biggest circle i could out of white fleece material, then cut a smaller (12" diameter) circle in the middle, and made 1 cut from the inner circle to the outside.  i cut and hot-glued red felt flower petals to the white fleece, and i was done! red tights, red turtle-neck, red and white hat, and some red shoes (i already had some red corduroy toms )
 
luckily we found a bar with no lines, not too crowded, snagged seats, and enjoyed our $3-4 beers (crazy cheap price for manhattan on a saturday!), got our street meat afterwards, and headed home to finish making pom garland and buffalo chicken dip  (not our exact recipe, but this is the easy version :P) before taking off again for our friends' holiday party at the beacon .
 
definitely a busy, but fun weekend!
only a few more days until we get to see our families for the holidays!!
(...so much to do before now and then though :/)
 
cheers!  

Tuesday, November 27, 2012

DIY Pom Wreath


this wreath is the extra "little something" that we needed to add some holiday spirit to our apartment.  you see, we live in a pretty small place, mr p is mr scrooge when it comes to christmas decorations, and we only have a limited space to keep it all.

putting up a wreath is a great way to set the mood, because it's the first thing visitors see when they enter your home (and it's the first thing YOU see too! so it puts you in the holiday spirit too!) so, if you don't put up many decorations for the holidays, choose a wreath.  actually, choose THIS wreath.  because it can be stuffed in a box, squashed in there however it fits, and you can always reshape it and refluff it next year when it's time to break it out again.  it's not one of those "be gentle when you put the trash bags over it! don't let the flowers come off! and set it on TOP of the stack of christmas boxes and don't let anything else touch it!" kinds of wreaths.

anyways, i made this last year, but it's SUUUPER simple enough that you don't need step by step pictures.

....DIY Pom Wreath....

tools/materials:
scissors
yarn
wire hanger
needle-nosed pliers

instructions:
1. start off by making about 20-30 poms in whatever combination of colors you would like.
(excellent video of how to make a yarn pom found here ..and while the video says to cut them clean, i like a few snaggles and some variation in pom size! ) this will take the most amount of time, so this is why i suggest doing this part first! you can make a few at a time, and come back to the project later if you want.

2. use your hands to shape the hanger into a circle (use the pliers for stubborn corners).  i untwisted the neck of the hanger so that the wreath is a simple circle, but you can leave the neck in tact for a nice hook to hang the wreath!

3. use the long threads of the pom to tie the poms onto the wire circle, then trim as needed.  the poms will be off-center from the wire, but once you bunch the poms together it will fill in more nicely.

4. hang onto the door, and enjoy for the entire holiday season :)

5.  hang a small photo frame filled with a solid piece of paper inside of it, and write a festive message on the glass with dry-erase marker for a fun addition (we first used these as food labels at friendsgiving ! i'm sure they will have many many uses in the future.  great $3 investment :P)

cheers!

Sunday, October 28, 2012

halloween 2012: 5 year olds for a night

mr p and i weren't going to dress up for halloween.
we were actually looking forward to just having a night in.
but... then our taekwondo school said they were having a party.
...and that everyone was going.

(well, if everyone's going....)

so, we went.  

we had no clue what to wear.  we sort of wanted to go as a couple, but we wanted our costumes to be not SO "couple"-ish, like we could have a cool costume even if we weren't connected at the hip the whole night.

somehow (pinterest, facebook post, something like that) i saw the idea to dress up as a school photo.

(no, not yourself dressed up in similar clothes from the school photo, dressed up as the ACTUAL photo)

this.   is.   genius!

mr p and i already have our kindergarden photos hanging up in our apartment, it's perfect.  plus, both of our pictures are pretty hilarious.  just see them below and judge for yourselves.


if you have gotten past those photos without smiling (let alone falling over laughing), there's something wrong with you.  i'm just making a funny smile, but mr p.... he's... in... a... tuxedo!!!

so since mr p doesn't want his (adult) face on the blog, here's how my costume turned out:


now for the WHOLE picture.


yep.  that's a spray-painted foam poster board straped to my back.  i did so good with it too, i didn't take it off until i got home!!

not everyone "got it" right away, so, thanks to a last minute decision and the idea from my mom, we decided to print 11x17 prints of our old pictures and tape them to the back so people could really see what we were doing.  see mr p's in action here:


those sweet costumes scored us second place in the costume contest, and $15 towards our next kickboxing payment! yayaya!

as for the rest of the fun costumes?  keep scrolling...

our favorite ghosts, with the best dance moves EVER (you're right charlotte, dancing under a sheet is SO much more fun! and looks WAY cooler)

myself, elliot and E.T., the other jenn, and dr. shots.....

the lovely audrey hepburn (and a side view of my costume in the background)


and... last but not least, the only costume that beat ours in the contest... karen:


talk about creativity!! and efforts!!
it's ON!
...and we're gonna win it next year.
(we better start planning now to beat THAT though!)

what did YOU do for halloween?
tell us about it!

cheers!
(and stay safe, you east-coasters)

Wednesday, September 12, 2012

reminiscing the renovations

last year on this day   (ok, last year on 9/11) , it was sunday, and mr p and i were busy busy bees.


we had just started renovations on our "new" jersey city apartment. it was day 7 of renovations, and that day we:
   - laid trim
   - ripped up the bathroom tile floors
   - laid new backerboard
   - grouted the bathroom tile
   - painted the tub with appliance paint
   - bought a stove
   - ripped out the bathroom vanity

i'm SO happy those days are over! small bits of renovating have continued to creep up now and again, but that first month of having keys to the new place was BRUTAL! (i guess our relationship can survive anything if we survived THAT!)

we actually did a LOT of renovations to our tiny apartment in our 100+ year old building.  check out the beginning of the story here (or click renovations on the left side bar)

what's your story? did you do any fun renovating or decorating in your home? tell us about it!

cheers!

Monday, August 6, 2012

rex ray postcard prints

if you haven't heard of rex ray, just google-image his name (or click here ).

his prints are SO fun.  and i've been a fan for a while.  but, it's hard to choose just one.

when i visited college friends in michigan in april, i snagged this postcard book of THIRTY prints for just $10!!! it was a STEAL in my opinion.  i had no intentions of ever using them as postcards, i always had my vision of framing them.  


so, i finally went to ikea to find MANY cheap, white frames , and came across white 4x6 frames, 2 for just $3!! score!

the postcards were slightly larger than 4x6, so i had to trim each of them down (pain in the BUTT!)


we then went to home depot and bought 2 10-ft long 1x3 boards .  chopped into 4 lengths of 56.5", we only wasted about 7 inches from each board!  each 10' board was only $5.58.  we had to buy 3 packs of 2" corner braces , $4.68/pack of 4, to mount the 1x3's to the wall (though we now realize we only need 2 because the frames are SO lightweight).

we installed the braces to the boards, made sure the boards were level on the wall, and drilled the screws into the wall, spacing each with 11" clear space!


i haven't really made sure the frames are all evenly spaced yet, i think i might need an OCD friend to come do that for me, because now that they are at least UP , i will probably put off putting them all in their REAL home for a while :P  i'm just happy we finally have some art above the new desktop!

materials:
24 postcards (or 24 4x6 pieces of fabric, scrapbook paper, fun magazine clippings, be creative!)
24 cheap, identical frames
1x3 boards, cut to desired length
2 corner braces per board, plus more if needed*

tools:
scissors (if paper/postcards are not the correct size)
tape measure
level
drill (or screwdriver and strong MUSCLES to screw in the screws!)

instructions:
1. cut postcards/paper to size and put in frames
2. measure location of corner braces on 1x3 boards, making sure to install them at the same distance from the end, each end, each board.  install corner braces by pressing (1) 1x3 up to a flat, vertical surface, placing the brace up tight to the vertical surface and flat against the board.  install screws with screwdriver or drill.
3. measure where each board is to be placed on the wall, evenly spaced, and leaving the same clear space at the top near the ceiling.
4. hold (1) shelf in place and adjust with level (may need 2 sets of hands for this step and from here on out, depending on the length of your shelf!)
5. drill screws into remaining wall holes of the braces.
6. repeat for remaining shelves.
7. lean all 24 frames against wall resting on the shelves.

voila!

cost breakdown:
postcards = $10
frames = $3/ 2 frames, 24 frames = $36
boards = $5.58, 2 boards = $11.16
brackets = $4.68/4, 3 packs = $14.04

total = $71.20

so, for WELL under $100, we filled up a whole wall full of art.  not. too. bad. IMO

keep in mind my space was 56.5" long, and i used 4x6 frames.  this method can be used with ANY size frames on ANY length of wall.


enjoy!

cheers.

p.s... thinking about painting the UNDER SIDE of the shelves a fun color... thoughts? color suggestions??

Sunday, April 8, 2012

sunday funday

the best kind of sunday, right?

i painted our wood chairs from the dining set that was in our apartment when we got it, and mr p painted a painting. 
(that was the deal after i kept nagging him to paint the painting)

...but before all that, we swept and steam-mopped ALL the floors (even under the couch and the claw-foot tub), dusted (including the wood trim), nozzled all floor/wall edges, and i TRIED going through my clothes to get rid of some, but sadly could only part with a small pile that i could pick up with 1 hand.

after all that was finished before noon, i decided that today was the day to paint the chairs! i put on some painting clothes and old tennies, i took my mini-radio, the chairs, and the paint outside, and i went to work on this beautiful day!!  (while mr p stayed inside painting :D)


(after bringing the chairs inside, i realized there are some bare spots on the chairs still... but that can wait for my next free weekend :P)

outlines sketched, painting the background a light whispy gray

practicing the lips

finished product! definitely better than buying a not-so-personal ikea or pier 1 painting, right? right.

after munching on empandas all morning and afternoon, i decided to make deviled eggs! (we had to do SOMETHING easter-spirited since we didn't really do any other easter festivities today)


(key to making these deviled eggs delicious?? LIME juice and SMOKED paprika!)

now it's time to pull out some tortellini from last weekend and frozen pesto and make dinner (since we couldn't get any fresh food because groceries are closed today for easter)  it's a good thing we prep ahead sometimes!!

happy easter :D

toodles.